Why on earth would anyone want twin sticks? What do you use them for? Why? What’s wrong with you!? All these questions came at me in a WhatsApp group I’m in with some local wheelers and Toyota guys. I could only come up with one explanation…

But seriously, why does anyone need twin sticks? Ok, there are 3 reasons I see.
1) They look badass. Like super badass.
2) Front Range fabrication sells the kit for my transfer case for around $180, and it seems like a fun project.
3) Imagine yourself in the rocks. Front locked up, rear locked up, and attempting a sketchy line over a monster obstacle. But you don’t make it. You slide down and need to re-position. But your front is locked, so while your wheels turn, you don’t actually turn. You plow back and forth. Unlocking the front is an option, but still requires the wheels to turn, and air to bleed down.
Wouldn’t it be nice to be able to on-the-fly disengage 4LO, switch to 2LO, turn your wheels and reposition, and then on-the-fly go back to 4LO? I thought so. Yet another tool.
Oh and one more benefit – you get 2LO and rear diff-lock. That seems like it could be fun.
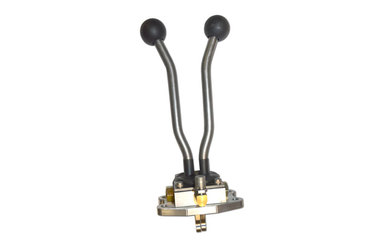
So I ordered the kit from Front Range Fabrication, and this is all that you get. And a set of instructions for a Tacoma. Which is supposed to be similar. Oh boy….
So on a Saturday morning, I set off to remove my transfer case. It was off and out relatively quickly. Remove the rear crossmember, and remove the transfer case shifter, and everything is pretty accessible.
While I don’t recommend it, it can be done by one person and a floor jack, but ultimately I had help from my 6 year old daughter, who lowered the jack as I was under the truck stabilizing the transfer case.


Once on a table inside, the disassembly began. Rear drive flange off, and remove the cover that hold the rear flange seal. Then the bolts holding the front and rear case halves together. Then, after you’ve drained the oil – if you hadn’t done so already – you split the cases.


The point of the disassembly of the case is, to remove the 4-2 shift fork, and grinding off the nub that keeps the Hi-N-Lo shifter from moving to Lo in 2WD. Secondly, there is a stainless steel “Pill” looking thing that needs to be removed as well, it rides between the two shift forks in the tail section of the case. It’s self-removing, as it immediately drops onto the floor when you split the case. That’s easy.


What happened next was the nerve wrecking part. Grab a hold of the output shaft, and slightly lift up and tilt it towards the front shaft, this will give you enough room to manipulate the drive chain off, and yank the entire gear stack out, shift forks and all.
I was sweating bullets, even though I was well hydrated with cold beers in my air-conditioned shop.

I ground the nub off of the shift fork, de-burred it, and put it back in the case right away, as if by some magical reason, the whole gear stack would fall into pieces on my dirty floor. None of that happened, and it all came together.
Make sure you clean all the mating surfaces, and apply the proper sealant per the Toyota TM.
I assembled the shifters, and operated the transfer case by hand to check basic operation. It worked! Reinstallation was the following Tuesday afternoon. Again, installation went pretty smooth, and can be done solo. A helper is nice, but not necessary.
With the modified case back in the truck, it was now time to actually use the part I had bought. Thats where the fun began. I’ll spare you the amount of times I installed the shifters and removed them again to tweak them some more. Front Range states “Simply bend shift arms to fit your vehicle”. Thats easier said then done. I was able to bend them with a large steel cheater pipe, with the shifter firmly secured in the bench vice.
The problem is that the shifters come up about 6″ behind the actual shifter location, so they need to be bent forward as soon as they protrude from the transfer case. Then up, and off to the right, to get to a point where they somewhat mate up, and ride on the same “plane”.


By the time this is accomplished, the shifters were too short. So I ran to the hardware store and got some beefy grade 8 bolts to match the supplied shift knob thread, and welded them on as extensions.


After all these shenanigans it was time to install the dual boot somewhere. I opted to fab up a plate to cover the top of the transmission tunnel, so keep water and dust out, much like the OEM boot.


Finally the end was in sight. I sealed the shifter boot, and installed the shifter kit onto the transfer case. After that I decided to use a piece of scrap aluminum, and trace channels for the shifters to ride in, like the ’80s and ’90s Ferrari’s. I cut a piece to size, which clipped right into the interior cover, ran the orbital over it for that brushed look, and shot it with 3 coats of flat clear. Installed some simple decals, and she was ready to try.


Conclusion.
It works. It’s cool. I get 2 Lo. I can disengage 4 in the rocks and leave the front locked. It looks good. Hordes of scantily dressed women throw themselves at my feet. What more can I want? Quiet time.
Funny thing is, that it’s loud. At highway speed, the shifters make a whining noise which I connected in my head with problems. I drained the fluid expecting to see shrapnel and broken clock springs and half a screwdriver to come out…. and nothing. The fluid looked clean, no metal. I removed the interior cover again, and installed some marine sound deadening stuff, which helped.
I then called Front range, and asked them what the deal was.
“The shifters have a much greater tolerance than the stock shifter, which is mounted on a spring loaded plate, with a rubber internal bushing, and a nice thick shift boot, and then another boot. This thing is wide open. The forks ride on the gear stacks, and you hear that. Live with it. We throw a jacket over it.”
Is it annoying? Nah. I throw a shemagh over it when driving on the highway, and I keep the tunes going. It then disappears. On the trails and at low speeds it’s fine, not noticeable.
All in all a great mod, worth the money if locked up front, and a fun project. The fitting of the sticks took me way longer than I had anticipated, and was way more time consuming than the actual transfer case work, the opposite of what I had anticipated.
